Tuesday, April 24, 2012

World's Best Egg Salad


I've been eating egg salad since I was a kid and love it.  On occasion, I would order it at a deli or try some at a reunion spread and was always disappointed.  How can you make egg salad without BACON?  If you have never (I'm so sorry) had egg salad without bacon, make up some of this right away and have it on toasted wheat bread.  You can thank me later!

But first we need to boil some eggs.  I have long gone by the 15 minute rule but found a site on Pinterest that had even better hints.  I tried it and it worked great:
         ~ Place eggs in heavy saucepan and cover with cold water.
         ~ Bring to a roiling boil.
         ~ Cover, turn off heat and set timer for 15 minutes.
         ~ Pour off hot water and cover in ice water (I put in sink and cover with ice and add water).  If all the ice melts, add more) for 15 minutes.
         ~ Put eggs back in heavy pan, cover and SHAKE. Keep shaking...side to side and up and down.
         ~ The eggs should now be cover in lots of tiny cracks and the shells with come right off!


Recipe:

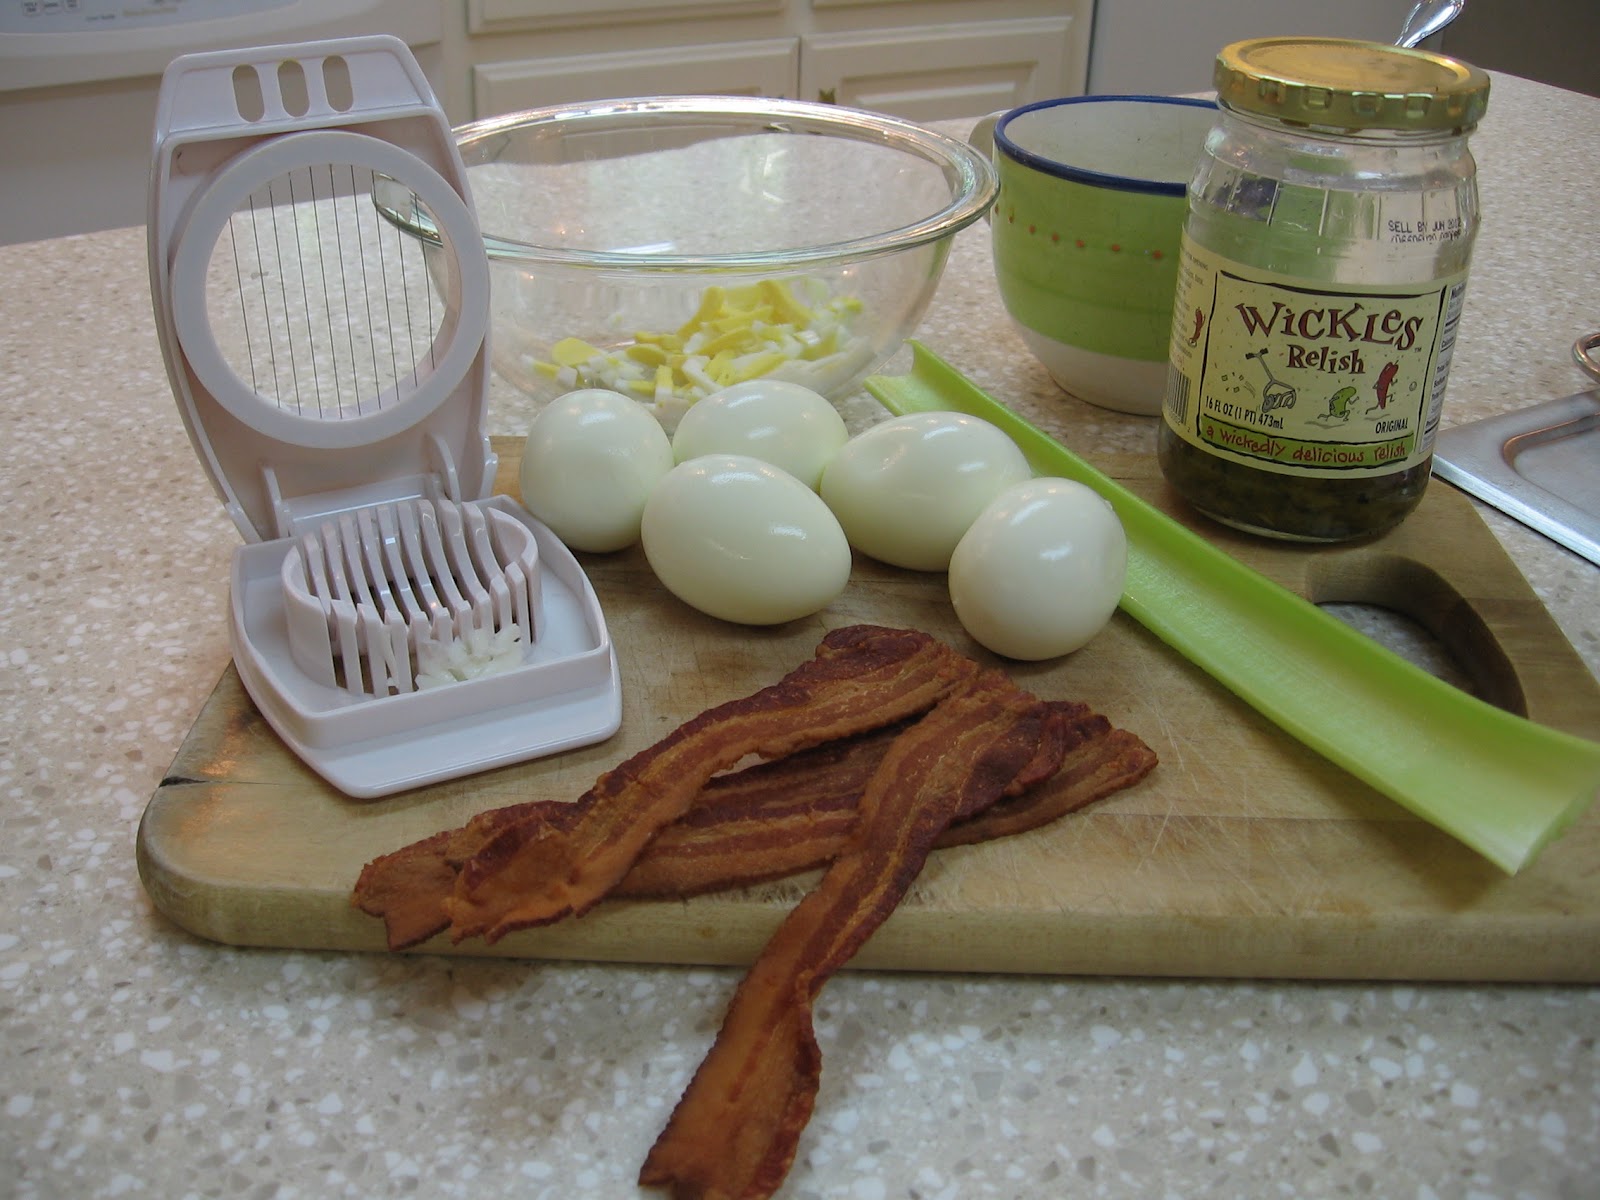
1 dozen boiled eggs, peeled & diced
8 slices of bacon, cooked crisp & crumbled (don't even think of using bacon bits!)
2/3 cup celery, finely diced (about 2 med sticks)
1 Tbls Wickles pickle relish (or sweet relish)

1 cup mayo
1Tbls cider vinegar
1 pkt sweetener (or 2 tsp sugar)
1 tsp mustard
salt & pepper to taste

In a large bowl, mix together the eggs and first three ingredients. Combine the mayo and last ingredients for the dressing and mix in with the salad.  Chill for at least four hours (overnight even better) and serve on toasted bread or with crackers on a bed of lettuce.

Tuesday, April 17, 2012

Protecting and Storing Recipe Cards


You will notice the stains and tears on old envelopes...time to make new ones!

It seems like it is impossible to keep cookbooks from getting stained when used often.  Add to that our problem of needing to adapt recipes for 2 to 16 people and you quickly discover a system to help you manage the kitchen chaos.

First, Mike went through and made tables for all the recipes we use often and broke then down into increments.  If it could be made individually, it made a table for 2,4,6, etc.  If it was a casserole, the table was for 4,8,12,16 (sizes for different combos of baking dishes).  This make it SOOO easy when you are cooking breakfast and haven't had all the coffee you really needed!


Next, I laminated them all with our handy-dandy laminating machine (one of the best investments I made for this place.) Or, you could take your cards to a local quick print shop. Most offer laminating service.

At first, this was enough.  But, as the piles of cards grew, it became necessary to corral them somehow. After looking around the office for ideas, the 9x12 inch mailing envelopes made themselves known.  Perfect size since we had printed recipes on half pages of card stock (4 1/4" X 5 1/2")


Cut off the bottom 6" of the envelope.


Reinforce the top with a strip of clear packing tape.  I just wrap the extra around to the back but you could seal both sides if you like.


Cut out a tab across the front, staying inside of the area that is taped.


Label the pockets and file in a handy drawer.


We have separate envelopes for "First Course," "Second Course," "Snacks,"  "Breads," and "Misc."

Tuesday, April 10, 2012

Displaying Antique Buttons


I love garage and estate sales.  About half of the inn was furnished from my finds over a five year period when we were working towards opening this place.  The buttons above were mixed in with a big bag of "sewing bits and pieces" I picked up in a beautiful old home close to University Park in Dallas.  When I got the bag home and discovered them in the bottom, I was in love.  They probably aren't worth much to a collector as there are tears and stains on the cards, but I like the vintage feel of the art work.

The buttons sat around in a box of fun things I might use if I could ever think of a way when a Martha Stewart catalogue (circa 1998) showed up with a product I had used as a child in my butterfly collecting days that I had completely forgotten about - bug specimen boxes.  Perfect!


They are cardboard frames wrapped in white paper with a protective glass cover.  There are two pins pushed through the sides to hold them together and the glass presses gently against the cotton pad on the inside to hold the specimen in place.  In this case, my specimen was a button card. Just center the card on the cotton, close up the box and hang (they come with little metal hooks.)


These boxes would be ideal for any light weight objects that wouldn't slide to the bottom.  Also the paper covering could be painted and the cotton inside could be covered with fabric.  They are a quick and inexpensive alternative to picture frames.

Tuesday, April 3, 2012

Growing House Plants in Water

I enjoy having live plants in my rooms.  They bring an energy to space (along with fresh air) and guests appreciate them. Having containers around with plants in water was more a necessity than a choice.  I have difficulty pruning off bits and discarding them, instead choosing to put them in a glass of water in the kitchen window.  Over time I have become an expert in what will root and thrive. (The pitcher on the left is full of prunings from the potted plant on the right.)


Twice a year, Mike brings all the house plants to the kitchen for me to fuss over.  The plants in pots will be examined and those with long shoots or runners will get pruned and new soil added to the pot. If they have grown quite large, they will be divided into two pots.  Some that have been in water will get potted (begonias get rotated every six months).  And some in water (ivy and other runners) will get roots trimmed back and fresh water.

Every fall, I trim back the begonias and have big vases of Angel Wings all over the house.

You will want to pinch off the bottom leaves as they turn yellow but they will thrive through the winter and be ready for potting outdoors in the spring.  When planting, prune off much of the bottom of the stem, leaving at least one node with roots,  otherwise the stem will stick out to far.  You want to plant them (several to a pot) so the the bottom leaf is only inches out of the soil.


Most of the ivy and other trailing plants just get clipped back each time,  I keep adding the pieces to existing jars until they get too full and then start another. They seem to do the best in low light so are perfect for nooks and crannies that are not close to windows.  When the house is empty for several days they all get moved to windows for a bit of sunlight.


Above is the re-potted Angle Wing Begonia and a vase with all the new ivy clippings.

Below is a stand on the back porch with all the newly potted babies.  Some will move inside when they grow up.


I have several plants that grow up on thick stems, loosing leaves on the bottom and producing a scraggly looking plant.  Almost all of those can be cut to the ground, put in water and new sprouts will emerge from the roots, producing a much fuller and happy looking specimen.


 As far as maintenance goes, I rarely need to change out water except those two times a year.  I do add a little mild fertilizer water now and then, and I pinch off any yellowing leaves.  Some water plants seem to thrive forever and others will let you know they are ready for soil (all the new growth will be smaller and sad looking)

My best advice: pick a sunny window, preferably one you look out of regularly (kitchen sink) and line up your clear jars of water to experiment.  You can watch to see which cuttings develop roots, how quickly and how well.  Some never will and just need to be composted when pruning. Some things (parsley and other garnishes we use) won't root but will stay fresh long enough to use over several weeks.

And THANKS to Elsie for suggesting this weeks blog topic.  I would have never thought of it on my own.