Showing posts with label Crafts. Show all posts

Tuesday, July 30, 2013

Beaded Sun-Catchers


Charlie & Cathy, long time regulars here at the inn, are responsible for quite a few of the goodies you see around the grounds. It started some years back when Cathy was taking a class making flower pots out of peat moss. I wondered if it would be similar to plans I had torn from a magazine for constructing giant concrete leaves. She decided we should  give it a try. They turned out great.  I kept the one in the round bed out front and gave the rest away as gifts.


Since then, occasional homemade additions show up; the tree bench out back, a smaller bench in the woods, and the mirrored gazing ball out front are all "C&C" originals.

This summer, Cathy found the bead sun-catcher idea on Pinterest. She collected inexpensive beads from different craft stores, I took apart some old jewelry and Charlie went to his wood shop to make us some hangers.


The wood hanger is about 15" long with a groove routed in the top the accommodate the lead weights we used as stops. Twelve holes were drilled for the fishing line and an extra hole was drilled at each end for the cable wire hangers. The 50 lb fishing line was cut into 12 strips about 20" long with a  round lead weight tied to one end.  The other end was fed through a hole and the beads were strung on and finished off with (fishing) slip sinkers to weight it down.


Cathy found the she liked having some beads that weren't clear that showed up better when the sun wasn't shinning and that she needed the blues, pinks and reds to stand out from all the green in the yard.  When we first hung this outside, the hummingbirds kept coming around to check it out!


I made one a little differently.  I had some old round metal buttons that were tied to one end of the string. Smaller beads from an old pair of dangley earrings that I really liked were mixed in with some of the bigger beads.  I only made five strands and hung them from an old small metal embroidery hoop (it took about five hands to get it lined up and snapped into place.


Mine has too many green beads to show up well outside so I have it hanging in the bathroom so I can enjoy it while soaking in the tub.

I have seen lots of versions of these online.  I liked the one done hanging from driftwood that had the occasional seashell mixed in.  Cathy said she was going to start checking out flea markets and garage sales for fun costume jewelry to use. If you make some, post pictures here so we can enjoy them!

Tuesday, January 8, 2013

Making Menu Cards


 I was working on our menu cards for this year's Valentines Dinner, (you will have to wait until later to see this one), and I thought it might be fun to drag out the ones from years past and have a look.  You might get some fun ideas for a party or event you are planning.  I must say I am glad these were made pre-Pinterest days.  Seeing some of the marvelous examples out there, I might have been intimidated to ever try.

Speaking of Pinterest, and I know from several funny blogs out there I'm not alone on this, we need to get over our "Pinterest Perfection" expectations.  More on this next week when I show you pictures of my cinnamon twist that needs some practice.

That first year that we started offering the Valentine's candlelight dinners, the printed menu was an afterthought, hurriedly printed off the day before. It was simply red cardstock for the cover, white printer paper for the lining, black type, some gold stamp ink and stretchy red/gold package twine left over from Christmas wrapping. It turned out to be a fun little souvenir that folks enjoyed from their romantic weekend out.
The next year I spent some time thinking about it and came up with something a little fancier. We alternate color schemes each year between red and blue (winter, snowflakes, etc). I started with a smokey blue velum for the cover. I cut out a heart template to place on top and then stamped snowflakes with white ink inside. I finished off the design with a running stitch-like border with a white colored pencil.
The inside was simply a white cardstock trimmed with scalloping scissors. The snowflakes inside were stamped with a denim ink and the pages were held together with a thin smokey blue ribbon with a tiny 3D snowflake tied to the tip
Another red themed menu was a thick, textured red card stock, folded over at the top, the edge coarsely torn, holes punched through red and white cards, and tied with multicolored pink & red embroidery thread. The red border and hearts between courses printed off the computer and the stamps were left over from previous years. (You can ignore the snowflake imperfection shown here --  I always keep the rejects for my scrapbook). The place cards were cut from the same paper and hand decorated.

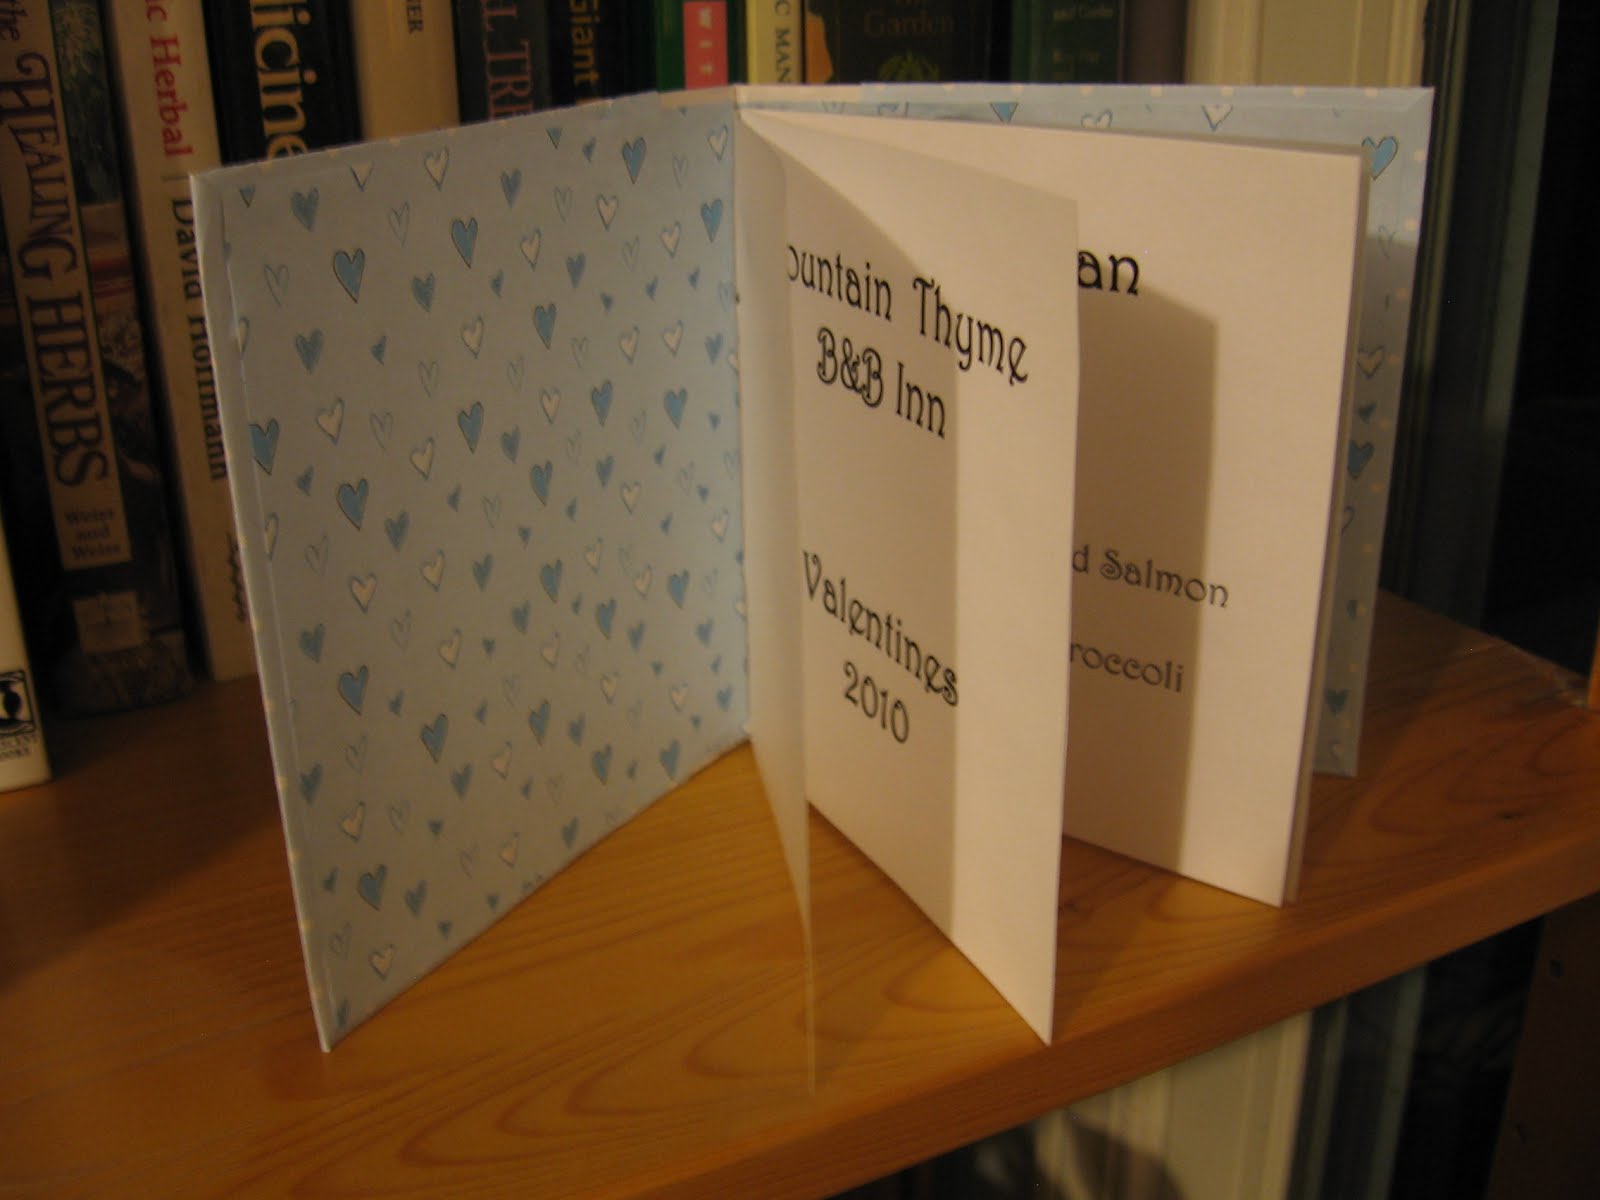
This next attempt was a little more time consuming.  I took my inspiration from a little book that was made for my mother's high school graduation. You start with two pieces of card board. The silver strip paper was glued to both pieces to bind the book. The polkadot paper was glued to the outside of each piece of cardboard, leaving an inch of silver stripe showing, and wrapping 1/2 inch around the other sides. The inside of the cardboard was covered with contrasting heart paper. (I used a glue stick for most of this but had to reinforce  a few spots.)
The pages inside consisted of one sheet of frosted velum and two sheets of light weight cardstock. The first page was the title with the individual menus on the center pages. The silver snowflake on the front was a rub-on decal and the pages were bound to the cover with silver ball/string that I cut off the edges of some wired ribbon.

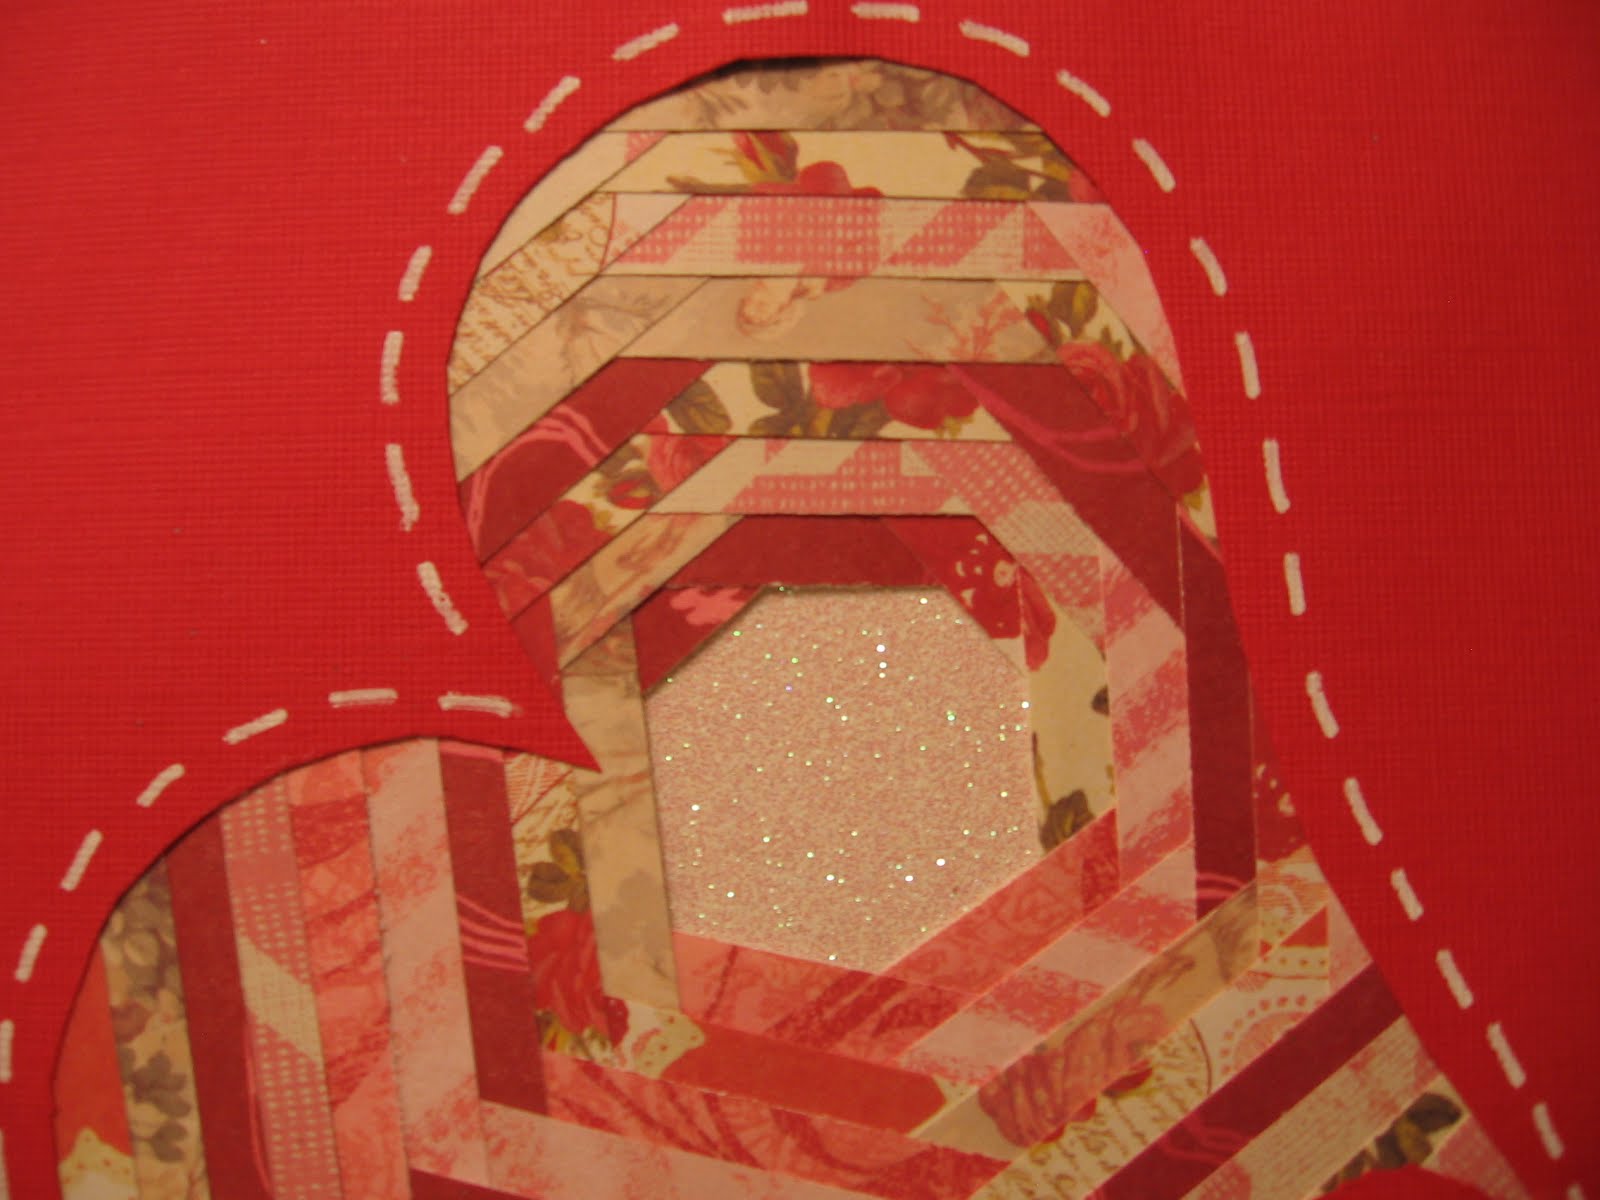
This card was inspired by a handmade Christmas card. It is simple but time consuming. But, it allowed me to use up lots of the red, white, and pink papers I had from years before. It is kind of like making a log cabin quilt. Strips of paper are just laid on and glued around a sparkly sheet of paper until there is enough to fill up the space. I used the white colored pencil to "stitch" around the edge.  Another sheet of red is glued to the underside to keep the quilt in place and finish off the inside. The inside was printed on white card stock and held in place with little sticky snowflakes
The idea for this card came to me from a handmade wedding invitation. The base of the menu and the name card are cut from a textured blue card stock.

The white menu is printed in blue ink to match the ink I had for the snowflake stamp. (It has been used many times in many colors). The velum surrounding the menu and layered on the name card was frosted with little glittery speckles (which are hard to see here). The menu was tied with frosted ribbon with a little snowflake stamped heart. The layers on the name card (after being glued together) are accented with sticky snowflakes.
This next menu got its inspiration from some wonderful thick handmade paper I got in Dallas. If you love paper and if it is still there, check out a place called Paper Routes. You will think you have died and gone to heaven.
I came up with a cone shape that resembled a heart when rolled up. The cone is tied closed with ribbon in two small hole punched in the front. The name cards were simple heart shapes. The white linings for the menu and place cards (heart shaped) were hand torn to fit the shape. (Just pencil the shape on the back side of the paper and gently tear along the line). Inside the cone, the top heart was placed to peak out the top and the two menu cards were lower and overlapping.  The little red hearts were the old fashioned lick & stick foil kind.
Last year I wanted to try making fun tissue paper flowers that I was seeing all over Pinterest. It was simply pale blue card stock, glittery wide ribbon, white card stock cut with those scollop scissors and a blue carnation glued on. The names were hand lettered on the front. The interior was printed computer except for the snowflake stamps.
My favorite was an original design. My friend, Janie, and I wanted a formal looking menu for our 10th anniversary. (We opened Valentines weekend, 1998). When we decided on a tuxedo, the rest was just cutting and pasting paper until we came up with something we liked.


The pinstripe is a light weight paper.  Heavy card stock would have been better but I couldn't find anything that worked.  The red for the vest and the white accents are heavier paper. The vest buttons were stick-on white hearts and the red flower in the jacket are red berries on green wire (floral dept) that we stuck through the paper and covered with red hearts front and back.  The menu is held together with that "repositionable" glue.  The name cards were made by taking two hearts, cutting a slit half way up the bottom of one and half way down the top of the other.  Holding the two perpendicular, slide the bottom slice on top of top slice. Glue the white heart on to create a 3D standup.

I hope these inspire you to greater things. I'm sorry I didn't have pictures of the process but these were made pre-blog.  I will do a better job of documenting this year and will share the results in March after all the dinners are over.

Tuesday, March 13, 2012

Making Your Own Linen Napkins


          ~ and mitering corners


[This is a stack I made about ten years ago.  Some are wearing out,
hence today's tutorial.]


Innkeepers need a lot of things, and linen napkins is one of them.  Buying ready made can get expensive when you have 16 people for breakfast every morning. Fortunately, making your own is a breeze....really.


First, find the linen.  Lots of places sell it online and, if you live in a place like Dallas, there are great fabric outlets to wander through.  You should be able to find a nice medium weight linen for $15 a yard or less (unless you want the very best Irish linen). 

Take the width of the fabric (usually about 54-56") and divide that in thirds (unless you are wanting very large dinner napkins - half it, or cocktail napkins - quarter it) and then figure out how many napkins you want to make.  For one dozen, you will take 18" (one third the width of 54") and multiply it by 4 (the number of rows of three you will cut out) = 72"  Divide that by 36" (inches in a yard) and you get 2.  You need two yards of fabric to make 12 napkins = less than $30 or $2.50 per napkin.


 Now cut your fabric  If you have exactly 2 yards, straighten fabric with selvages together and cut in half and then cut those two pieces in half...which leaves you with 4 - 8" pieces.  Now cut each of those pieces into thirds.  Folding the fabric in a triangle guarantees you a perfect square (or almost). The same quality that makes linen wrinkle also make it very easy to iron in nice straight hems. And the open weave makes it easy to cut the fabric evenly.


I fold it over once more so all four sides line up an trim anything that is a bit off kilter.


Next, with a hot iron, fold over a nice, straight 1/2" hem on all four sides.


I am making a one inch hem.  If you want a deeper hem, adjust accordingly. Fold right sides together at the corner. This will create a triangle with the point at the bottom. With a ruler, go down from the tip so that there is 1 1/2" in a straight line and mark off a triangle with washable marker (I just used soft lead pencil).


Next, disect that triangle with another mark (which should be about one inch long).

It should look like this.


Sew down the middle line...


Snip off the excess...and do the other three corners the same.


Turn...

And press, keeping the finished hem as straight as you can.


At this point, you have a pretty nice looking napkin.  You just need to decide how you want to finish it.  You could just machine or hand stitch a hem stitch in white for a nice elegant look.  Or, you could embroider on all kinds of fun borders.

I just sew a long running stitch in the color of our blue tablecloths.  This not only adds a nice touch but also prevents me from having to hem stitch to finish. (I know, my stitches aren't even...such is life!)

One hint for hand sewing:  When you thread your needle, do so BEFORE you cut the thread from the spool.  This guarantees less twisting and knotting.

Note: All of our tablecloths and most of our napkins are made this way (linen and cotton).  It is easy to do and makes for a nice finished product.

Don't hesitate to let me know if these instructions are not clear.


Thursday, March 1, 2012

Making Button Napkin Rings


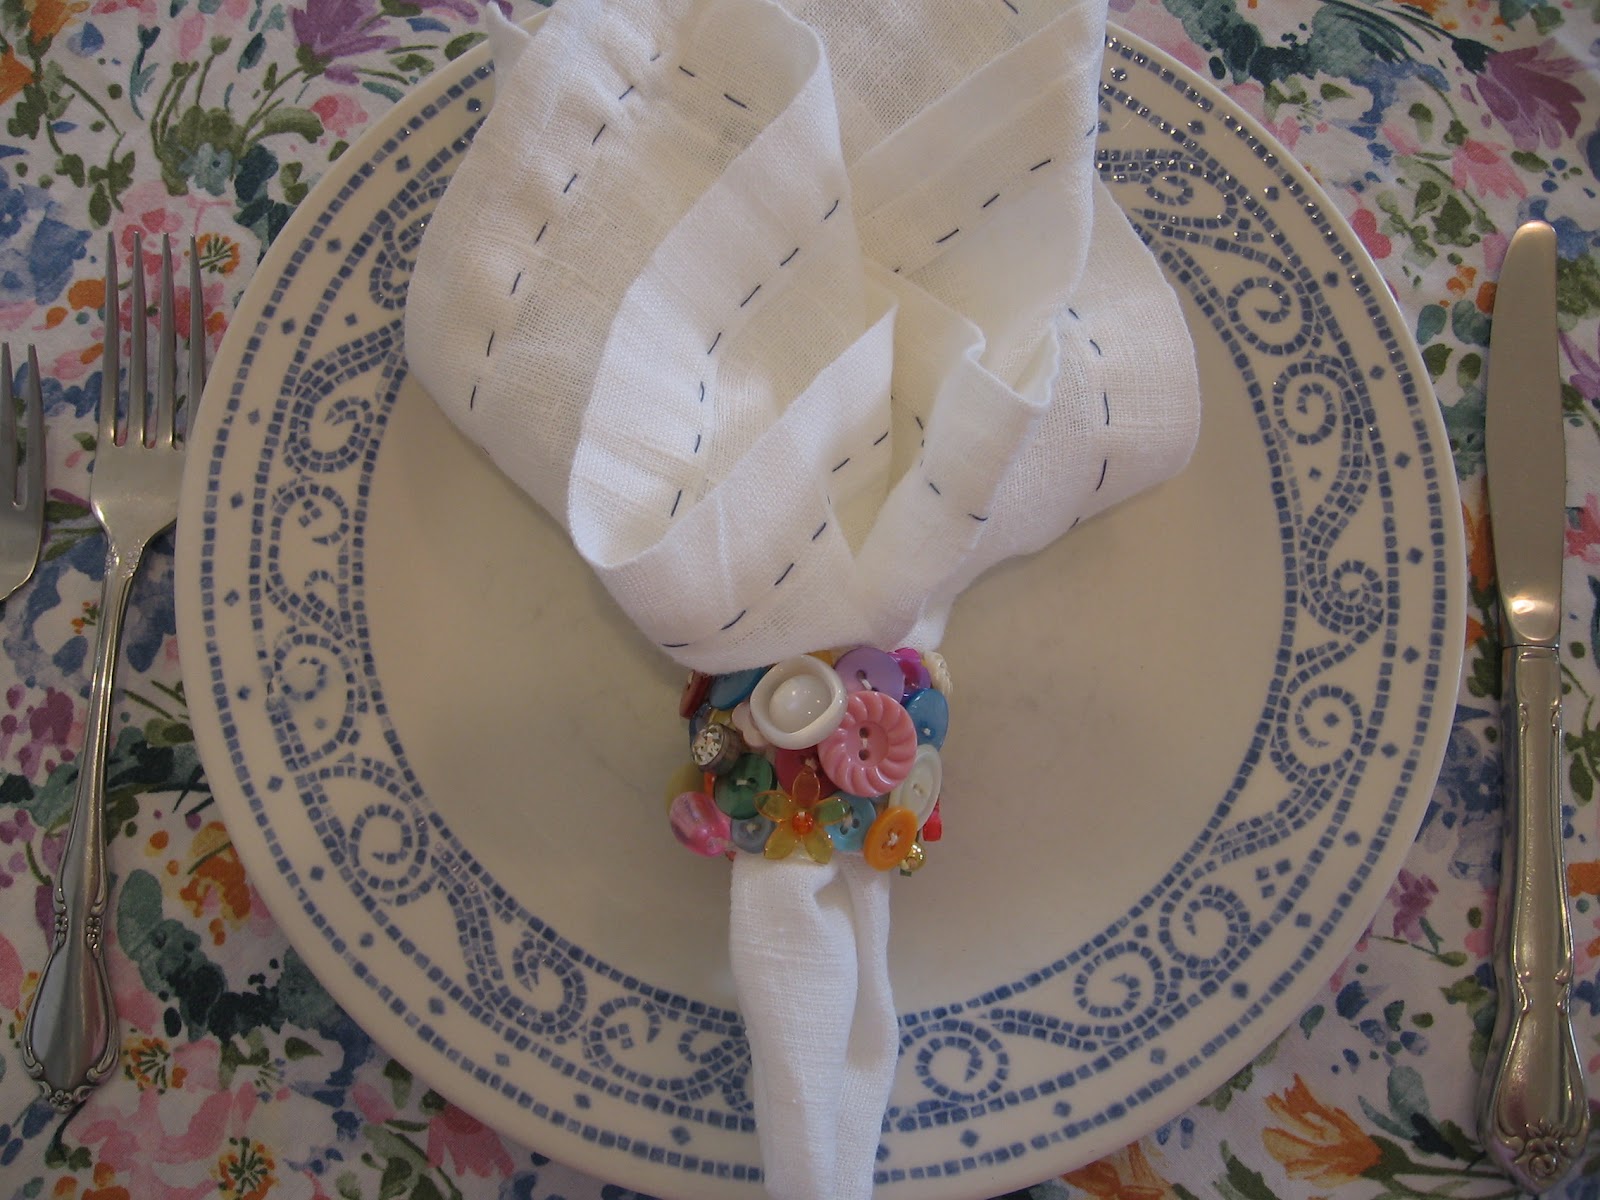
They are fun and easy but take a little time.  I made these to co-ordinate with our multicolored floral tablecloths.  You could use school colors, holiday green & red or blue & gold, or all natural bone. I just happen to have several tins of old buttons from Mom, who used to make all our clothes when I was growing up.  I recognize many of the buttons on these rings and it brings back happy memories when I am setting the table with them.


First, cut the number of rings you want out of waistband elastic, about 4.5" long for each.  You can get the width that works for you. I happen to like the wider kind.


Sew on individual buttons, making sure to knot off each one.  This will ensure they don't all come off when one invariably does.  The flat buttons are easier to work with but use different kinds, shapes and colors for interest.  Be aware that metal buttons tend to eat through the thread quicker so double sew those for stronger attachment.

 When you get close to the end, leave a little bit of elastic so you can whip stitch the ends together. The mistake I made with the my first try was not allowing the the elastic to drape around my fingers.  When I went to finish it and brought the two ends together, the buttons were all popping up and I had to go back and tuck in more buttons to keep the elastic from showing. If you keep forming the elastic into a ring as you go along, you get a better idea how the buttons will lie.

After you attach the two ends together, finish sewing buttons over the seam and..volia!
I like being able to stretch the rings but, if you would like for the inside to be more finished, you could cut a strip of felt the size of the inside and glue it in after sewing.

If this short tutorial is not clear, please don't hesitate to send questions.  The great thing about blogs is I can edit and update them after the fact!